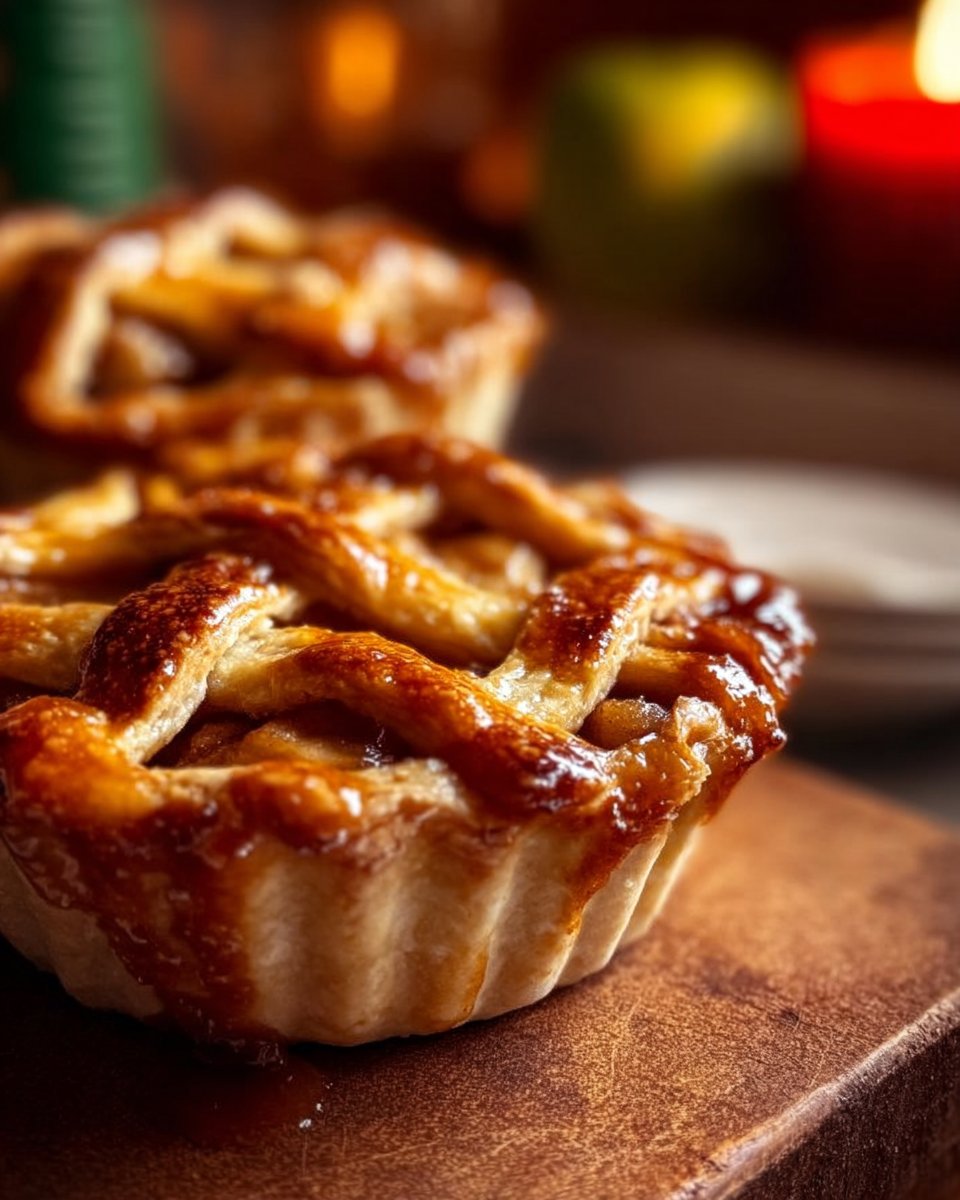
Mini Apple Pies
Introduction
I stumbled upon this delightful mini apple pie recipe during a cozy autumn afternoon when the rich scents of cinnamon and baked apples filled my home. My daughter had just returned from a school field trip to an apple orchard brimming with juiciness and color, and we decided to turn our freshly picked bounty into something magical. As we peeled and chopped apples together, laughter spilled from our kitchen, and that sense of togetherness made this recipe a cherished family tradition.
What makes these mini apple pies special is not just their adorable size but the warmth they bring to gatherings. Each pie carries a burst of flavors wrapped in a buttery crust, inviting everyone around the table to share stories and create memories. They’re not just snacks; they’re little moments of joy and comfort.
What Makes This Recipe Special
These mini apple pies are perfect for a variety of occasions be it a family gathering, a picnic in the park, or just a cozy night in. They’re quicker to prepare than a large pie, ideal for those on-the-go moments. Furthermore, they are easy to freeze, making them a flexible option that allows you to enjoy wonderful flavors at your convenience.
The recipe is adaptable, inviting you to swap in your favorite spices or add a scoop of ice cream on top, appealing to diverse tastes and dietary preferences. With every bite, you’ll appreciate the satisfying blend of sweet and tart apples paired with aromatic spices. Their size is also a hit, offering just the right amount of sweetness without the guilt. Your friends and family will rave about them, making these pies a reader favorite for sure.
Ingredients You’ll Need
For the Crust:
- 1 ½ cups all-purpose flour (ensure fresh for a flaky texture)
- ½ teaspoon salt
- 1 teaspoon sugar
- ½ cup unsalted butter, chilled and diced
- 4–6 tablespoons ice water
For the Filling:
- 3 medium apples, peeled, cored, and diced (choose your favorite varieties for diverse flavors)
- ¼ cup sugar (adjust based on your preference for sweetness)
- 1 teaspoon cinnamon
- ½ teaspoon nutmeg
- 1 tablespoon lemon juice (to balance sweetness)
- 1 tablespoon cornstarch (for thickening)
For Assembly:
- 1 egg, beaten (for egg wash)
- Sugar for sprinkling on top (optional)
How to make Mini Apple Pies
- Prepare the Crust: In a bowl, mix the flour, salt, and sugar. Cut in the butter until it resembles coarse crumbs. Stir in the ice water, a tablespoon at a time, until the mixture forms a ball. Wrap in plastic and refrigerate for at least 30 minutes.
- Make the Filling: In another bowl, combine the apples, sugar, cinnamon, nutmeg, lemon juice, and cornstarch. Toss until the apples are evenly coated, then set aside.
- Preheat the Oven: Preheat your oven to 425°F (220°C).
- Roll Out the Dough: On a floured surface, roll out the chilled dough to about 1/8 inch thick. Cut into circles that fit your muffin tin.
- Assemble the Pies: Place the dough circles into the muffin tin cups. Spoon the apple filling into each pie crust, filling generously.
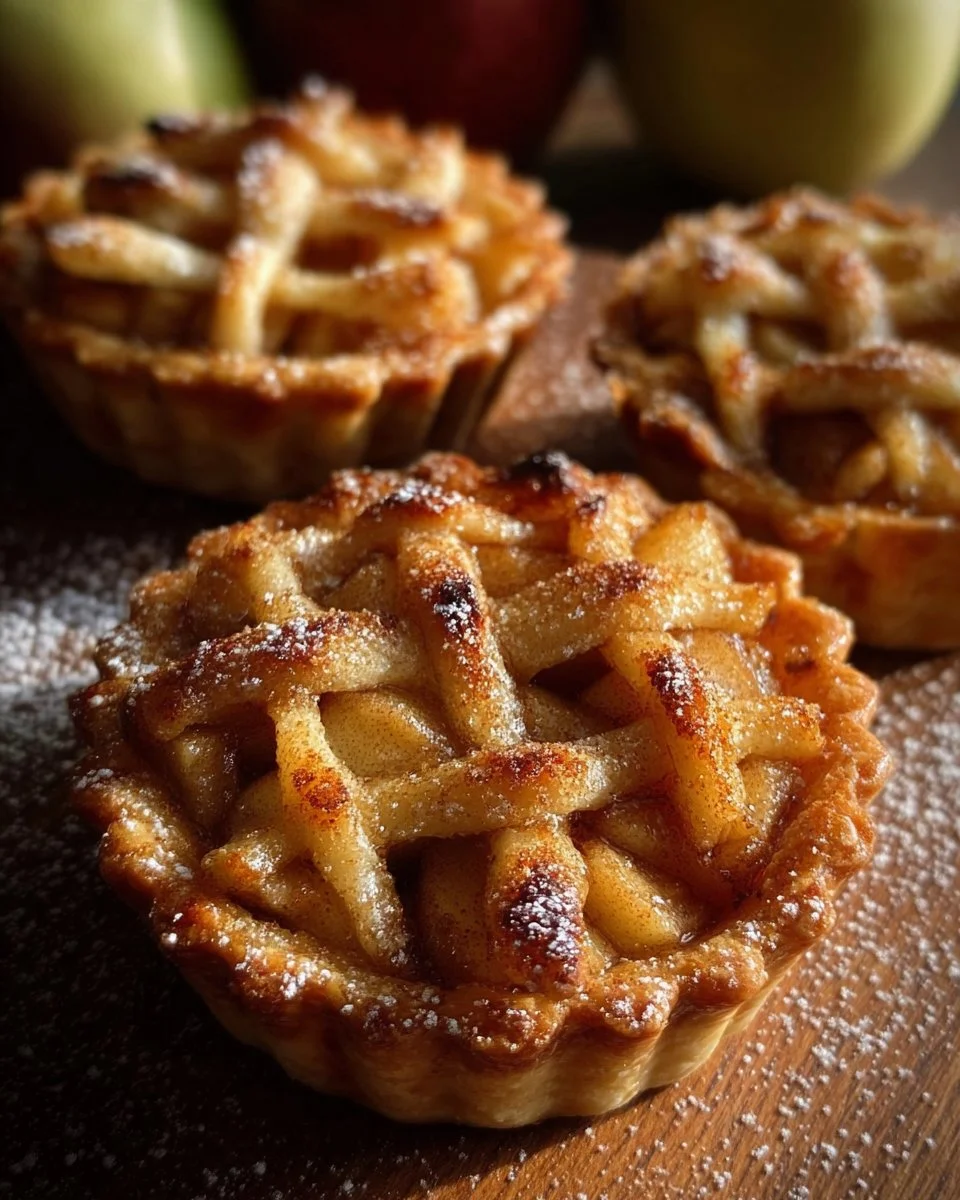
- Top the Pies: Roll out remaining dough and cut out smaller circles for the tops or create decorative lattice patterns. Seal the edges and brush the tops with the beaten egg. Sprinkle sugar on top, if desired.
- Bake: Bake for 18-20 minutes, or until the crust is golden brown and the filling is bubbling.
- Cool: Let the mini pies cool in the tin for 10 minutes before transferring to a wire rack.
Tips & Recipe Variations
- Quality Ingredients: Use fresh, firm apples for the best texture and flavor. Consider a mix of sweet and tart apples for complexity.
- Crust Variations: Try adding a pinch of cinnamon to your crust for extra flavor or use store-bought dough for a quicker option.
- Dietary Options: For a gluten-free version, substitute all-purpose flour with a gluten-free flour blend.
- Storage: These mini pies can be stored in the fridge for up to three days or frozen for up to two months. Reheat them in the oven for a crispy finish.
Best Ways to Serve
These mini apple pies are divine straight from the oven. Consider serving them warm with a scoop of vanilla ice cream for an irresistible combination. For a more festive touch, drizzle with caramel sauce or sprinkle with powdered sugar to enhance their presentation. Pair with a hot cup of tea or cider for the ultimate cozy experience. Each pie is perfectly sized, making them an ideal dessert that everyone can enjoy.
Common Questions
- Can I make this recipe ahead of time? Yes, you can prepare the filling and crust in advance. Assemble the pies just before baking for the best texture.
- Can I freeze the leftovers? Absolutely! Just ensure they are cooled completely, then store in an airtight container in the freezer.
- What can I use instead of cornstarch? You can substitute with all-purpose flour or tapioca starch if you prefer.
- How do I prevent the dish from becoming watery? Always ensure to coat your apples in cornstarch and drain excess moisture if using pre-cooked apples.
- Can I make this vegetarian or dairy-free? Yes, use a dairy-free butter substitute for the crust.
Conclusion
Every bite of these mini apple pies radiates warmth and nostalgia, a reflection of our cherished memories in the kitchen. Making them is more than just a recipe; it’s a way to foster closeness with loved ones. I invite you to try this recipe, gather your favorite people, and create your heartwarming stories. Feel free to share your results or any tweaks you made I’d love to hear about your culinary adventures!
“These mini apple pies are a hug in a pastry! So fun and just the right size my kids can’t get enough!” – Happy Baker
Mini Apple Pies
Ingredients
Method
- In a bowl, mix the flour, salt, and sugar.
- Cut in the butter until it resembles coarse crumbs.
- Stir in the ice water, a tablespoon at a time, until the mixture forms a ball.
- Wrap in plastic and refrigerate for at least 30 minutes.
- In another bowl, combine the apples, sugar, cinnamon, nutmeg, lemon juice, and cornstarch.
- Toss until the apples are evenly coated, then set aside.
- Preheat your oven to 425°F (220°C).
- On a floured surface, roll out the chilled dough to about 1/8 inch thick.
- Cut into circles that fit your muffin tin.
- Place the dough circles into the muffin tin cups.
- Spoon the apple filling into each pie crust, filling generously.
- Roll out remaining dough and cut out smaller circles for the tops or create decorative lattice patterns.
- Seal the edges and brush the tops with the beaten egg.
- Sprinkle sugar on top, if desired.
- Bake for 18-20 minutes, or until the crust is golden brown and the filling is bubbling.
- Let the mini pies cool in the tin for 10 minutes before transferring to a wire rack.
Notes

- Vegan Love Letter Pastries: Flaky Strawberry Jam Envelopes - January 16, 2026
- Beefy American Goulash - January 13, 2026
- Authentic Tom Kha Gai Soup Recipe - January 11, 2026