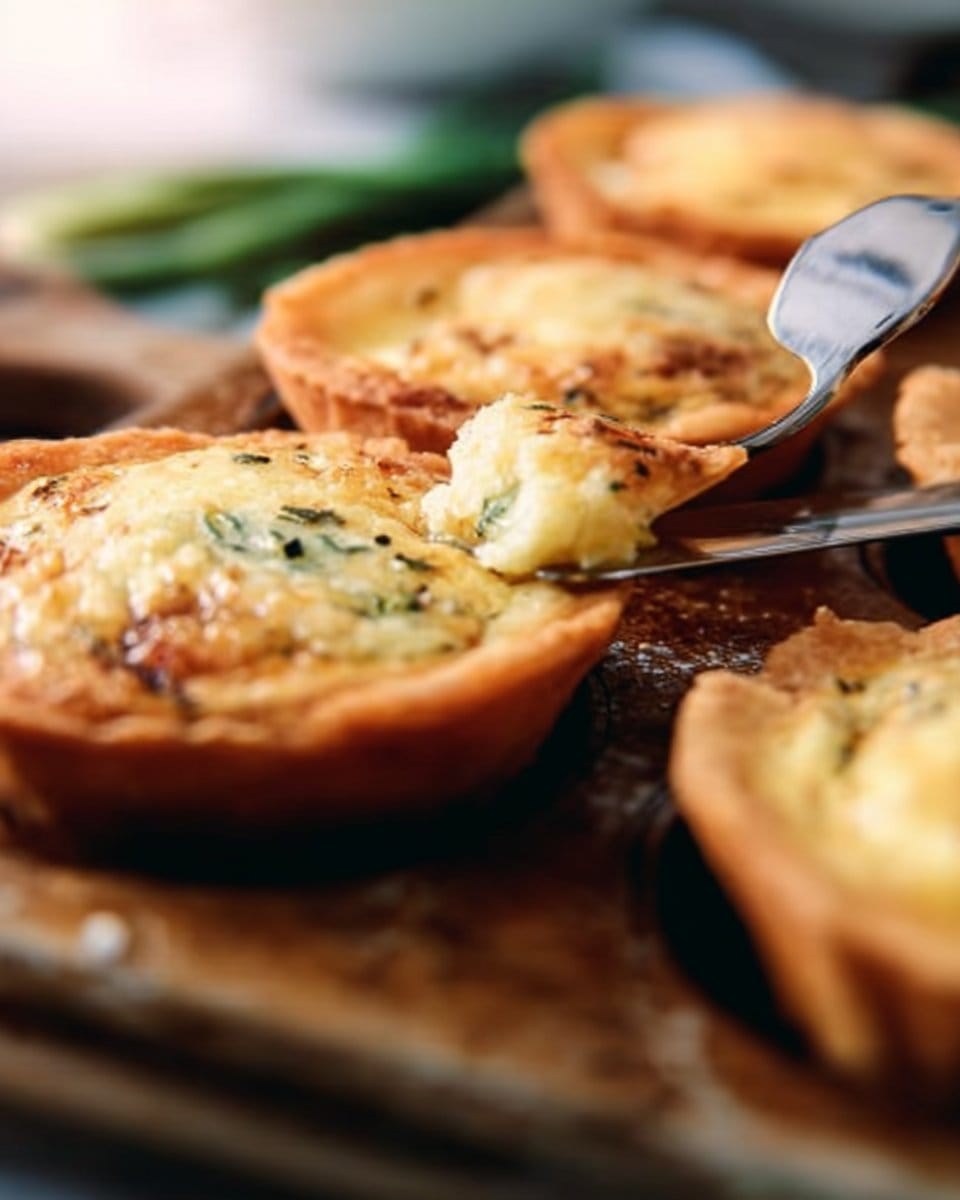
Mini Quiches
Introduction
The first time I tasted a mini quiche, I was at a friend’s holiday brunch. The pleasant aroma of baked eggs and cheese wafted through the air, creating a cozy atmosphere that instantly warmed my heart. As I took a bite, the harmonious blend of flavors danced on my palate, making the dish unforgettable. From that moment onward, mini quiches became a staple in my own kitchen, especially for gatherings with family and friends. The beauty of this recipe lies not only in its delightful taste but also in its versatility. Each bite transports you to that sunny brunch table, evoking memories of laughter and joy shared over delicious food.
What Makes This Recipe Special
Mini quiches are the perfect marriage of convenience and flavor. They can easily be customized, allowing you to create various fillings based on your preferences or seasonal ingredients. This recipe is not only quick to whip up but also packs in nutritious ingredients, making it a family-approved favorite. Plus, they can be enjoyed hot or cold, which makes them an excellent option for meal prep or potlucks. This versatility, combined with their delightful taste, ensures that readers will fall in love with this recipe just as I have.
Ingredients You’ll Need
To create these delicious mini quiches, gather the following ingredients:
For the Crust
- 1 package of pre-made puff pastry (thawed if frozen)
- 1 tablespoon of olive oil (optional, for greasing)
For the Filling
- 6 large eggs
- 1 cup of milk (or any milk alternative you prefer)
- 1 cup of shredded cheese (like cheddar, mozzarella, or feta)
- 1 cup of chopped vegetables (such as spinach, bell peppers, or mushrooms)
- ½ cup of diced cooked meat (like ham or bacon; optional)
- Salt and pepper, to taste
Note: For a healthier twist, consider using a whole grain crust or making your own from scratch. Fresh, organic ingredients will elevate the flavor, especially for vegetables and cheese.
How to Make Mini Quiches
Follow these simple steps to create the perfect mini quiches:
Step-by-Step Directions
- Preheat the Oven: Preheat your oven to 375°F (190°C). This ensures an even cooking temperature for perfect, golden quiches.
- Prepare the Muffin Tin: Lightly grease a muffin tin with olive oil to prevent sticking. You can also use silicone muffin cups for easy removal.
- Roll Out the Pastry: Roll out the thawed puff pastry on a lightly floured surface. Using a round cookie cutter or a glass, cut out circles to fit your muffin tins.
- Assemble the Crusts: Gently press the pastry circles into the muffin tins to form the crusts. Make sure they line the bottom and sides.
- Whisk the Filling: In a large mixing bowl, whisk together the eggs, milk, salt, and pepper until well combined.
- Add Fillings: Distribute your selected vegetables, cheese, and diced meat evenly among the crusts. Pour the egg mixture over the fillings until just full.
- Bake: Place the muffin tin in the preheated oven and bake for about 20-25 minutes, or until the egg is set and the tops are golden brown.
- Cool and Serve: Let the mini quiches cool in the tin for a few minutes before using a fork to carefully lift them out.
Tips & Recipe Variations
- Experiment with Fillings: Try different combinations, such as goat cheese with sun-dried tomatoes or broccoli with cheddar for various flavor profiles.
- Add Fresh Herbs: Incorporate fresh herbs like thyme, basil, or chives to enhance the taste.
- Make Them Vegetarian: Omit the meat and add more veggies for a hearty vegetarian option.
- Storage: Store leftover mini quiches in an airtight container in the refrigerator for up to 3 days, or freeze for up to a month. Reheat in the oven for the best texture.
Best Ways to Serve
Mini quiches are delicious on their own, but you can elevate the dining experience with these serving suggestions:
- Accompaniments: Pair with a fresh salad or a side of fruit for a balanced meal.
- Presentation: Arrange on a platter with a sprig of fresh herbs for an eye-catching display.
- Beverage Pairing: Serve with a light wine or a refreshing mocktail for brunch or a casual gathering.
Common Questions
- Can I make this recipe ahead of time? Yes! Prepare the filling and crust ahead of time, and assemble them just before baking for the best results.
- Can I freeze the leftovers? Absolutely! Freeze the mini quiches after they have cooled completely. Just reheat them in the oven when you’re ready to enjoy.
- What can I use instead of milk? You can use almond milk, oat milk, or any dairy-free alternative in this recipe.
- How do I prevent the dish from becoming watery? Make sure to thoroughly drain any cooked vegetables before adding them to the filling. This will help keep the mini quiches from becoming soggy.
- Can I make this vegetarian or dairy-free? Yes! Simply omit the meat and use a dairy-free cheese alternative for a delicious vegetarian or dairy-free version.
Conclusion
These mini quiches have a special place in my heart, evoking memories of laughter-filled brunches and cozy family gatherings. They showcase the essence of comfort food while allowing for a dash of creativity in the kitchen. I hope you give this recipe a try and make it your own. Please share your experiences or any tweaks you make there’s something magical about discovering the recipes that bring us together!
“These mini quiches were an absolute hit at my brunch party! Everyone loved that they could customize their flavors. I can’t wait to make them again!” – Rachel M.

Mini Quiches
Ingredients
Method
- Preheat your oven to 375°F (190°C).
- Lightly grease a muffin tin with olive oil or use silicone muffin cups.
- Roll out thawed puff pastry on a lightly floured surface and cut out circles to fit muffin tins.
- Gently press the pastry circles into the muffin tins to form the crusts.
- In a large mixing bowl, whisk together the eggs, milk, salt, and pepper until well combined.
- Distribute vegetables, cheese, and meat evenly among the crusts. Pour the egg mixture over the fillings until just full.
- Bake in the preheated oven for about 20-25 minutes, or until the egg is set and the tops are golden brown.
- Let the mini quiches cool in the tin for a few minutes before carefully lifting them out.
Notes

- Vegan Love Letter Pastries: Flaky Strawberry Jam Envelopes - January 16, 2026
- Beefy American Goulash - January 13, 2026
- Authentic Tom Kha Gai Soup Recipe - January 11, 2026