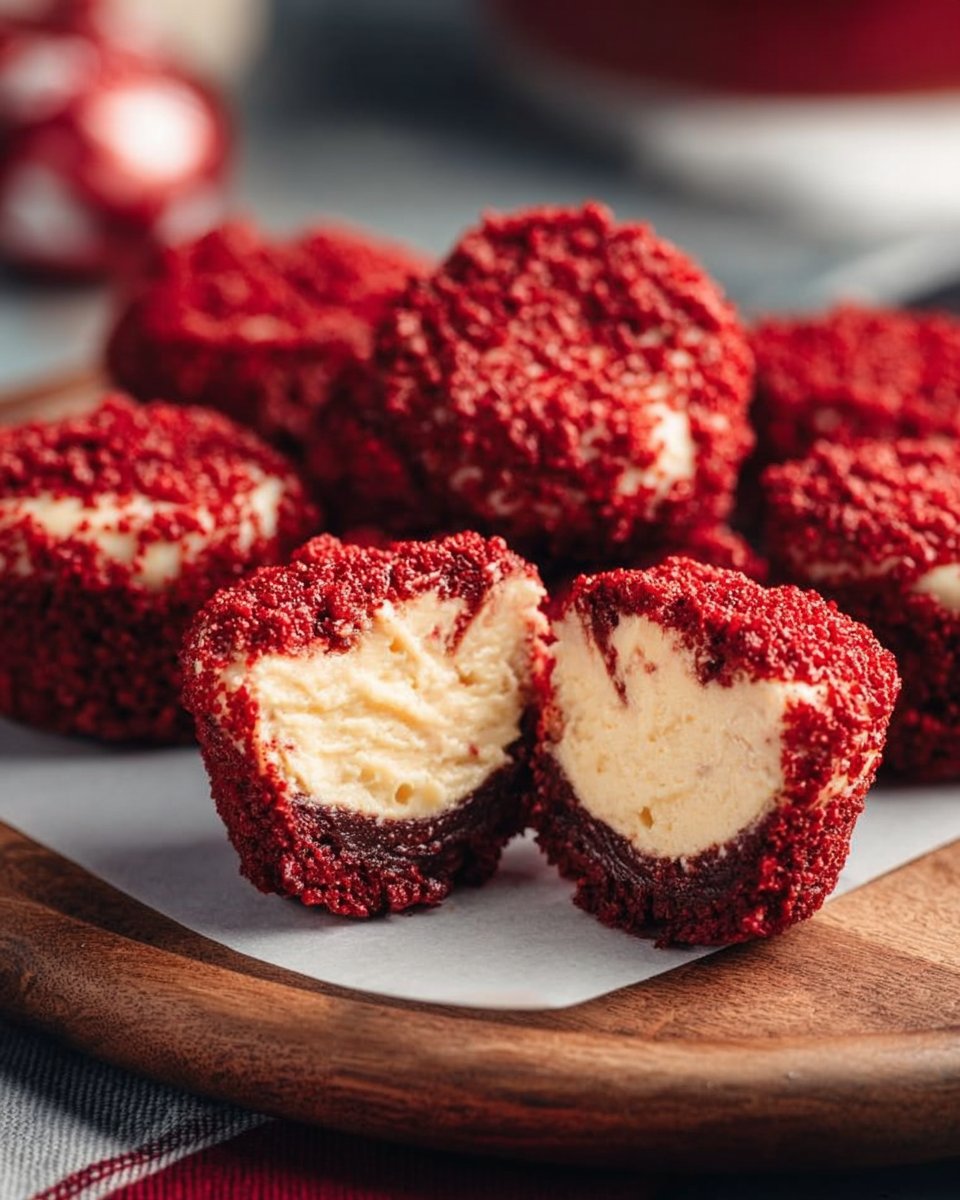
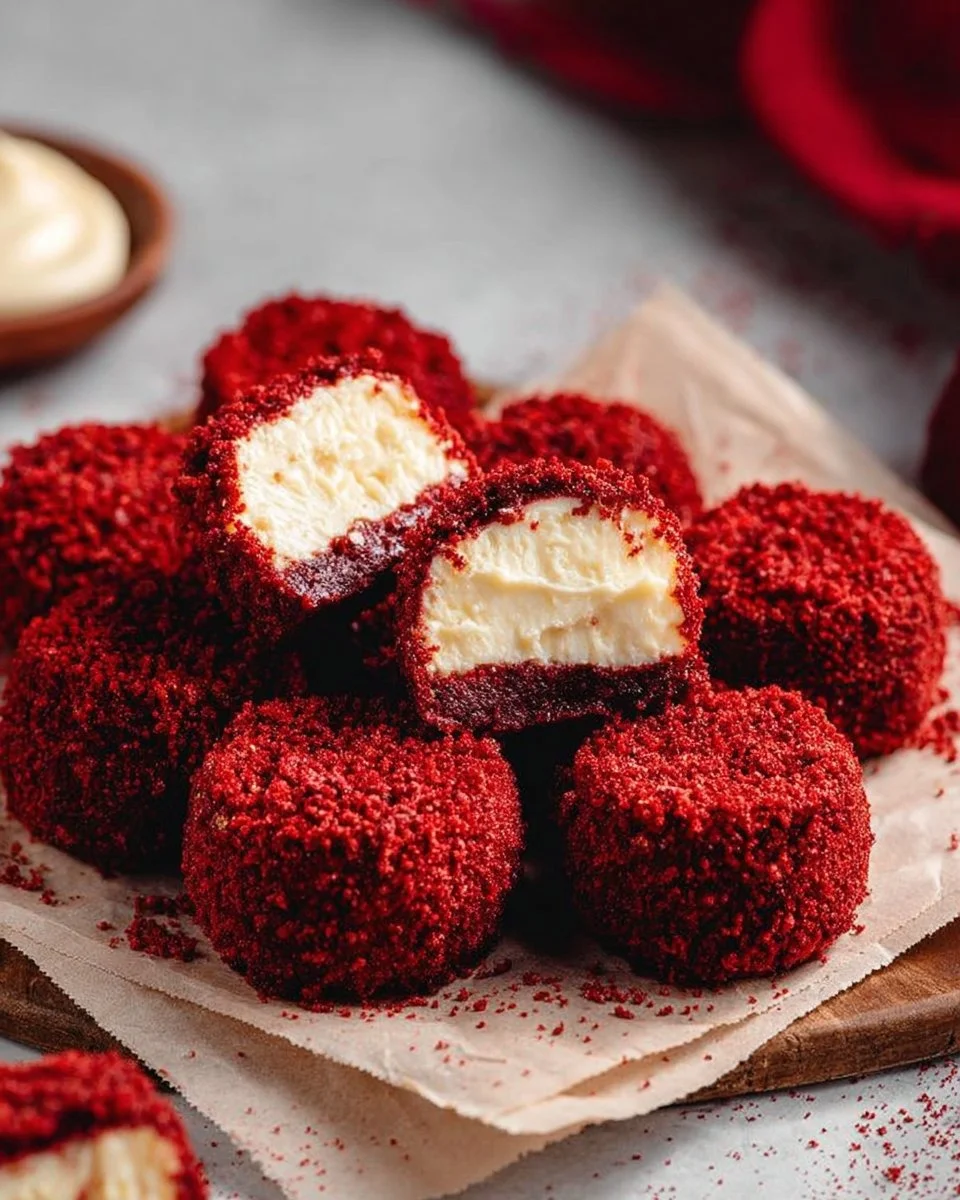
Red Velvet Cheesecake Bites
*** Introduction ***
I first stumbled upon the idea of Red Velvet Cheesecake Bites during a holiday gathering, when a friend brought a plate that quickly disappeared. The moment I took a bite, I was captivated by the luscious cream cheese filling combined with the rich, velvety cake. The beautiful red color and creamy texture sat on my taste buds, creating an unforgettable experience. It wasn’t long before I decided to create my own version of these delightful bites, perfect for family gatherings or special events. This recipe is special to me because it combines two of my favorite desserts, creating a cherished treat that I can share with loved ones.
*** Why It’s a Reader Favorite ***
What makes these Red Velvet Cheesecake Bites a must-try is their delightful combination of flavors and textures. They are perfect for various occasions: birthday parties, holiday celebrations, or just a sweet indulgence on a cozy evening at home. Not only are they fun to make, but their bite-sized nature means you can enjoy the richness of cheesecake and the whimsy of red velvet without feeling overwhelmed. Plus, these treats are a surefire hit with family and friends; anyone who takes a bite cannot help but smile!
*** Ingredients You’ll Need ***
For the Red Velvet Layer:
- 1 cup all-purpose flour
- 1/3 cup unsweetened cocoa powder (high-quality for a richer taste)
- 1 cup granulated sugar
- 1/2 teaspoon baking soda
- 1/4 teaspoon salt
- 1/2 cup unsalted butter, softened
- 2 large eggs
- 1/2 cup buttermilk (you can make your own by adding lemon juice to milk)
- 1 tablespoon red food coloring
- 1 teaspoon vanilla extract
For the Cheesecake Filling:
- 8 oz cream cheese, softened
- 1/2 cup powdered sugar
- 1 teaspoon vanilla extract
- 1/4 cup sour cream
For the Coating:
- 1 cup white chocolate chips
- Optional: Sprinkles for decoration
*** How to Prepare This Recipe ***
Step 1:
Preheat your oven to 350°F (175°C) and prepare a mini muffin tin with liners.
Step 2:
In a large mixing bowl, combine the flour, cocoa powder, granulated sugar, baking soda, and salt. Mix until well combined.
Step 3:
In a separate bowl, cream the softened butter until light and fluffy. Add in the eggs, buttermilk, red food coloring, and vanilla extract, and mix thoroughly.
Step 4:
Gradually add the dry ingredients to the wet mixture, stirring until just combined. The batter will be thick and velvety.
Step 5:
Spoon the red velvet batter into the mini muffin tins, filling each cup about two-thirds full. Bake for 12–15 minutes or until a toothpick inserted comes out clean. Allow them to cool completely.
Step 6:
While the red velvet bites are cooling, prepare the cheesecake filling. In a mixing bowl, beat the softened cream cheese until smooth. Gradually add the powdered sugar, vanilla extract, and sour cream, mixing until creamy and free of lumps.
Step 7:
Once the bites are cool, use a small knife or a melon baller to create a well in the center of each bite. Fill each well with the cheesecake filling.
Step 8:
Melt the white chocolate chips in the microwave in 30-second intervals until smooth. Let it cool slightly before dipping the tops of the cheesecake bites into the melted chocolate. Allow the excess to drip off.
Step 9:
If desired, sprinkle the tops with colorful sprinkles for an extra festive touch. Let the chocolate set before serving.
*** Tips & Recipe Variations ***
- Use high-quality chocolate for melting to enhance flavor.
- For a gluten-free version, substitute normal flour with a gluten-free blend.
- Switch up the flavors by adding a dash of almond extract instead of vanilla for something unique.
- You can store these bites in an airtight container in the refrigerator for up to a week. They can also be frozen for up to a month, making them perfect for meal prep.
- If you prefer a more decadent finish, consider drizzling the chocolate instead of dipping, for a swirl effect.
*** How to Enjoy This Dish ***
These Red Velvet Cheesecake Bites are perfect for sharing! They can be served at gatherings alongside a refreshing glass of iced tea or a warm cup of coffee. For added flair, present them on a beautiful dessert platter, adorned with fresh berries or a sprinkle of powdered sugar for contrast. Each bite can be complemented with a scoop of vanilla ice cream for indulgence!
*** Common Questions ***
- Can I make this recipe ahead of time?
- Yes! You can prepare the bites a day in advance. Just store them in the fridge until you’re ready to serve.
- Can I freeze the leftovers?
- Absolutely! These bites freeze well. Just be sure to place them in an airtight container.
- What can I use instead of buttermilk?
- You can use regular milk by adding a tablespoon of vinegar or lemon juice to make your own buttermilk substitute.
- How do I prevent the chocolate from seizing?
- Make sure to temper the chocolate and avoid any moisture during melting; it’s best to use a dry bowl and spatula.
- Can I make this vegetarian or dairy-free?
- Yes! You can find dairy-free cream cheese and use non-dairy butter to make these bites suitable for a vegetarian or dairy-free diet.
Conclusion
These Red Velvet Cheesecake Bites hold a special place in my heart as a delightful fusion of two beloved desserts. With their eye-catching color, vibrant flavors, and creamy texture, they truly bring joy to any occasion. Sharing this recipe feels like passing on a family tradition, one tasty bite at a time. I encourage you to try making these beautiful bites and find the joy they bring your gatherings. Don’t forget to share your results or any personal twists you might have added!
“The moment I took a bite, I was spellbound! These Red Velvet Cheesecake Bites are not just a dessert; they’re a delightful experience!” – A satisfied home baker.
Red Velvet Cheesecake Bites
Ingredients
Method
- Preheat your oven to 350°F (175°C) and prepare a mini muffin tin with liners.
- In a large mixing bowl, combine the flour, cocoa powder, granulated sugar, baking soda, and salt. Mix until well combined.
- In a separate bowl, cream the softened butter until light and fluffy. Add in the eggs, buttermilk, red food coloring, and vanilla extract, and mix thoroughly.
- Gradually add the dry ingredients to the wet mixture, stirring until just combined. The batter will be thick and velvety.
- Spoon the red velvet batter into the mini muffin tins, filling each cup about two-thirds full.
- Bake for 12–15 minutes or until a toothpick inserted comes out clean. Allow them to cool completely.
- While the red velvet bites are cooling, prepare the cheesecake filling. In a mixing bowl, beat the softened cream cheese until smooth.
- Gradually add the powdered sugar, vanilla extract, and sour cream, mixing until creamy and free of lumps.
- Once the bites are cool, use a small knife or a melon baller to create a well in the center of each bite.
- Fill each well with the cheesecake filling.
- Melt the white chocolate chips in the microwave in 30-second intervals until smooth. Let it cool slightly before dipping the tops of the cheesecake bites into the melted chocolate.
- Allow the excess to drip off.
- If desired, sprinkle the tops with colorful sprinkles for an extra festive touch. Let the chocolate set before serving.
Notes
- One-Pot Macaroni Cheeseburger Soup Recipe - January 13, 2026
- Cheesy Beef Rigatoni Bake - January 5, 2026
- Easy Sheet Pan Blueberry Shortcake - January 4, 2026