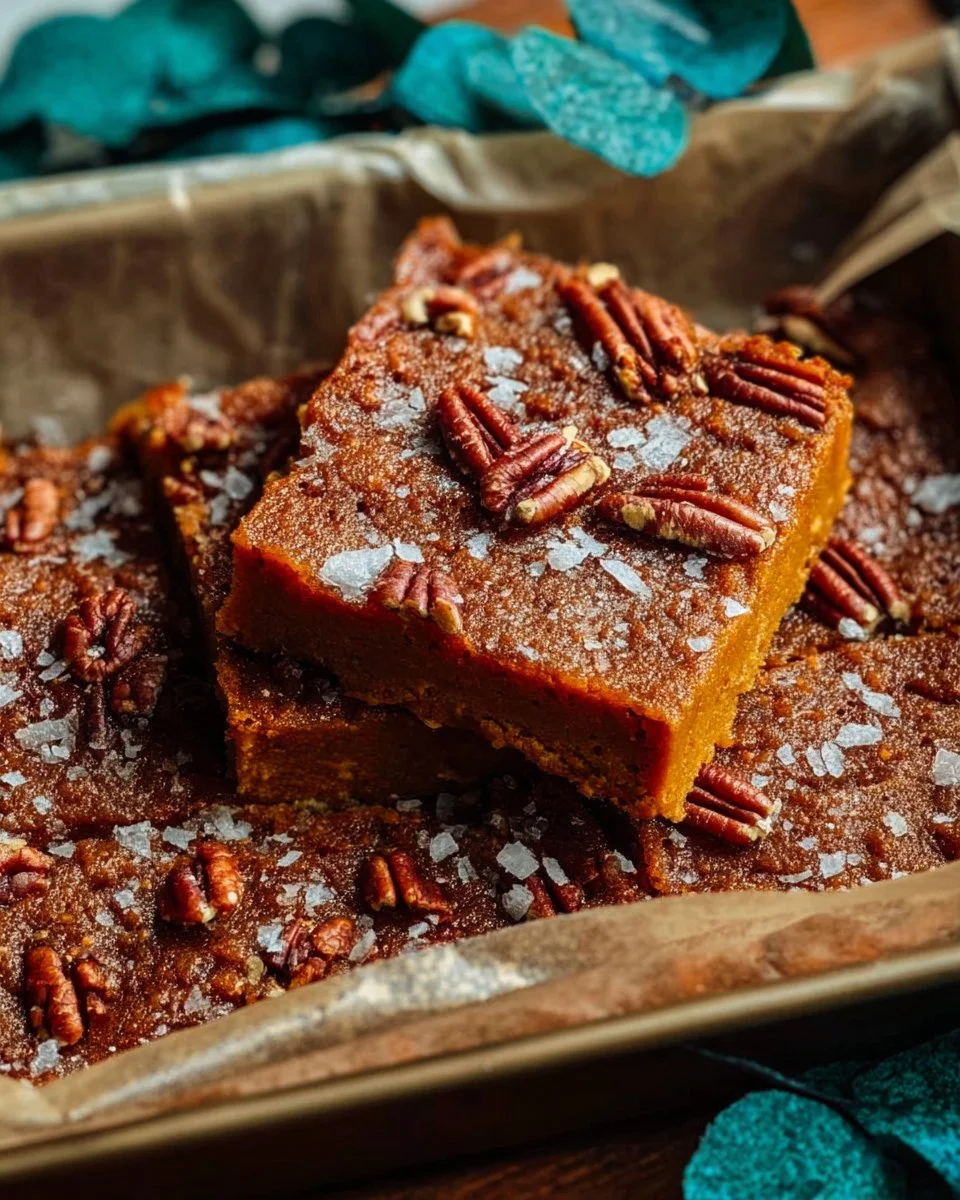
Sheet Pan Pumpkin Pie Bars
Introduction
I developed this recipe on a rainy Saturday when I needed a quick crowd pleaser. I combined pantry staples with a bit of pumpkin spice nostalgia and baked them on a single sheet pan so I could spend more time with family than in the kitchen. The result was a tray that vanishes within an hour and invites second helpings.
You will love these bars because they are:
- Fast to assemble and easy to portion
- Rich in pumpkin flavor yet light and creamy in texture
- Perfect for family gatherings or potlucks
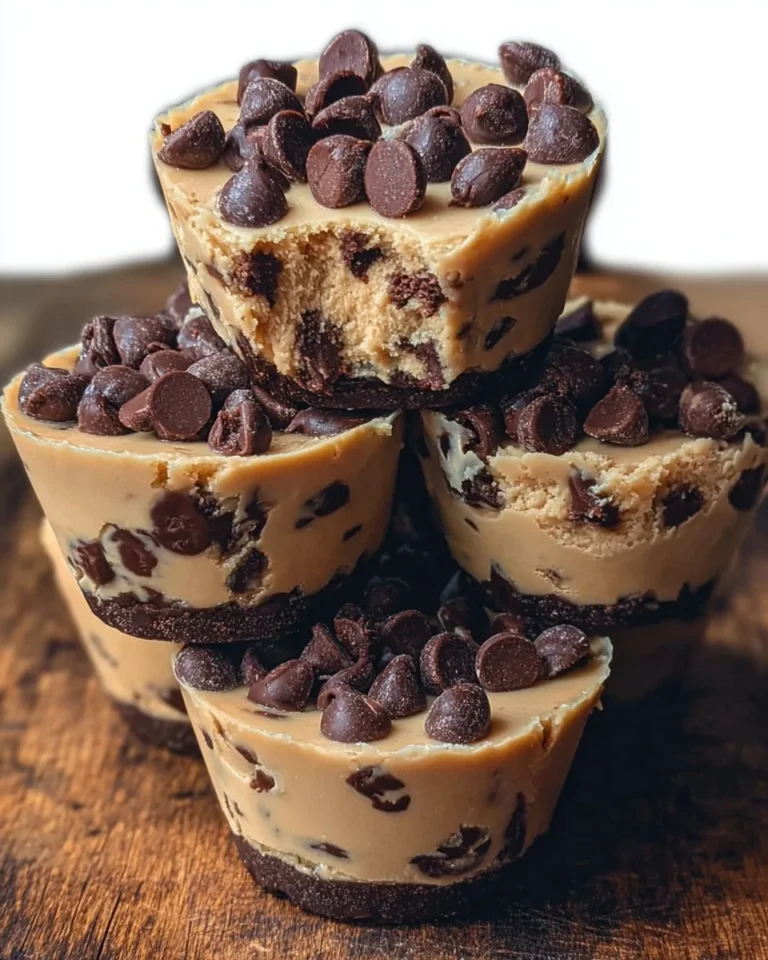
For another cozy dessert to pair at a party, try this chocolatey shortbread bar recipe I like: Chocolate Chip Pecan Pie Shortbread Bars.
What Makes This Recipe Special
I still remember the first time I pulled a tray of Sheet Pan Pumpkin Pie Bars from the oven. The kitchen smelled like warm cinnamon and toasted pecans, and my kids crowded the counter with sleepy, delighted faces. I wanted a dessert that captured the cozy comfort of a classic pumpkin pie but fed a crowd without the fuss of slicing dozens of small pies. That is how this sheet pan version was born.
The texture is what sold me: a buttery, slightly crisp crust, a creamy spiced pumpkin filling, and a tender top that browns just enough. It became our easy go to for holiday potlucks and chilly weekend gatherings because it looks and tastes like something special while being simple to make.

Ingredients You’ll Need
For the Crust
- 2 1/2 cups all purpose flour, spooned and leveled (use unbleached for better flavor)
- 1 cup (2 sticks) unsalted butter, cold and cubed (cold butter makes the crust flakier)
- 1/2 cup granulated sugar
- 1/2 teaspoon salt
- 1 large egg, lightly beaten
For the Pumpkin Filling
- 2 (15 oz) cans pumpkin puree (not pumpkin pie filling), use high quality canned pumpkin or homemade puree
- 1 1/4 cups brown sugar, packed
- 2 large eggs plus 1 egg yolk, room temperature
- 1 1/4 cups evaporated milk or full fat milk for creaminess
- 2 teaspoons vanilla extract
- 2 teaspoons ground cinnamon
- 1/2 teaspoon ground ginger
- 1/4 teaspoon ground nutmeg
- 1/4 teaspoon ground cloves
- 2 tablespoons all purpose flour (helps set the filling)
- Pinch of salt
Optional Topping
- 1/2 cup chopped toasted pecans or walnuts
- Powdered sugar for dusting Notes and substitutions
- For a gluten free crust, replace flour with a 1:1 gluten free flour blend and chill the dough longer.
- Use pure pumpkin puree, not sweetened pumpkin pie mix, to control sweetness and spice.
- Evaporated milk gives a silky texture; full fat milk works in a pinch.
How to make Sheet Pan Pumpkin Pie Bars
Step 1: Prep and preheat
- Preheat oven to 375°F (190°C).
- Line a 13×18 inch rimmed sheet pan with parchment, leaving a bit overhang to lift the bars out later.
Step 2: Make the crust
- In a large bowl, whisk together 2 1/2 cups flour, 1/2 cup sugar, and 1/2 teaspoon salt.
- Cut in the cold butter using a pastry cutter or two forks until the mixture resembles coarse crumbs with pea sized bits of butter.
- Add the beaten egg and mix just until the dough holds together when pressed. If too dry, add 1 tablespoon cold water at a time.
- Press the dough evenly into the prepared sheet pan, about 1/4 inch thick.
- Bake crust for 12 to 15 minutes, until the edges are lightly golden and the surface is set but not browned.
Step 3: Prepare the pumpkin filling
- While the crust bakes, whisk together the pumpkin puree, brown sugar, 2 eggs + 1 yolk, evaporated milk, vanilla, spices, 2 tablespoons flour, and a pinch of salt until smooth.
- The filling should be pourable and glossy.
Step 4: Assemble and bake
- Remove crust from oven and reduce oven temperature to 350°F (175°C).
- Pour the pumpkin filling evenly over the warm crust and spread gently with an offset spatula to smooth.
- Sprinkle chopped nuts on top if using.
- Bake for 25 to 30 minutes, until the edges are set and the center is only slightly jiggly when nudged. The top should be matte, not wet.
Step 5: Cool and slice
- Cool the sheet pan completely on a wire rack, about 2 hours, then chill for at least 1 hour to firm the filling for clean slices.
- Lift out using the parchment overhang and cut into 24 squares or rectangles. For cleaner cuts, chill again and use a sharp knife warmed under hot water then dried between slices.
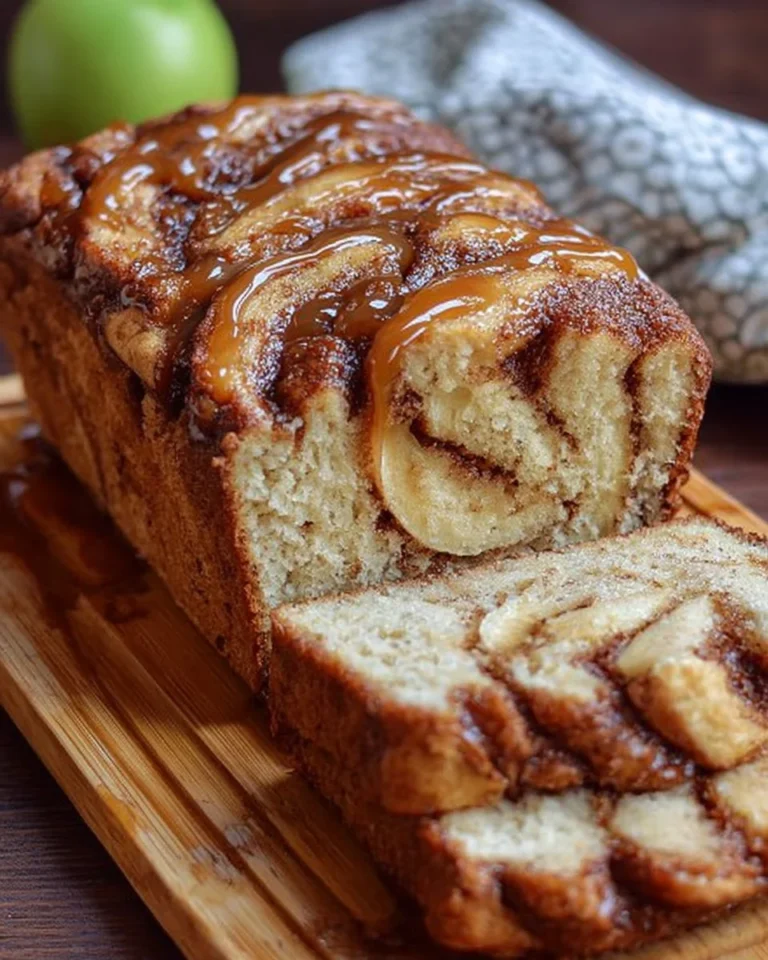
For more ideas on handheld desserts that travel well to potlucks, check these apple treats: Apple Pie Egg Rolls.
Tips & Recipe Variations
- Use cold ingredients for the crust to ensure a flaky texture.
- Avoid overbaking the filling. Remove when it still has a slight wobble; it will set as it cools.
- To make mini bars, bake in a quarter sheet pan and reduce baking times by about 5 to 8 minutes.
- Gluten free option: swap the crust flour with a cup for cup gluten free blend and press firmly.
- Dairy free: use a vegan butter for the crust and full fat coconut milk for the filling.
- Storage: refrigerate in an airtight container up to 4 days. Freeze baked, cut bars between parchment layers for up to 2 months. Thaw in the fridge overnight and bring to room temperature before serving.
- Reheating: warm briefly at 300°F for 6 to 8 minutes or microwave a single piece for 10 to 15 seconds.
How to Serve
- Serve warm with a dollop of whipped cream or a scoop of vanilla ice cream for extra indulgence.
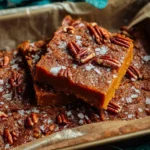
- For a festive touch, dust with powdered sugar and sprinkle toasted pecans.
- Pair with hot coffee, chai tea, or spiced cider to complement the pumpkin spices.
- Each sheet pan yields about 24 bars; estimated calories per bar vary with toppings but plan around 220 to 300 calories per piece.
- For a brunch spread, arrange bars on a large platter with small bowls of toppings like caramel sauce, whipped cream, and chopped nuts.
Frequently Asked Questions
Q: Can I make this recipe ahead of time?
A: Yes. Bake and chill the bars, then store in the fridge. They actually slice cleaner after chilling and can be served cold or gently warmed.
Q: Can I freeze the leftovers?
A: Absolutely. Freeze slices between parchment paper in a sealed container for up to 2 months. Thaw in the fridge overnight.
Q: What can I use instead of evaporated milk?
A: Use full fat milk or a 1:1 mix of milk and a tablespoon of cornstarch to mimic evaporated milk thickness. For dairy free, use full fat coconut milk.
Q: How do I prevent the filling from becoming watery?
A: Use pumpkin puree not pumpkin pie filling, add the 2 tablespoons of flour to help set, and avoid overmixing. Bake until the center is just set.
Q: Can I make this recipe nut free or vegan?
A: Yes. Omit nuts or replace with seeds. For vegan, use plant based butter and a flax egg for the crust, and a coconut milk based filling with a vegan egg replacer.
Recipe Review
“These bars are pure comfort in every bite. The crust is perfectly tender and the pumpkin filling reminds me of a classic pie without the effort. We served it at our family gathering and everyone asked for the recipe. A new favorite.” – Sarah M.
Conclusion
These Sheet Pan Pumpkin Pie Bars combine the flavors of a traditional pumpkin pie with the ease of a single tray dessert. They are a reliable, crowd pleasing option when you want something warm, comforting, and simple to portion. If you enjoy variations on pumpkin desserts, you might like to compare other takes like this classic Pumpkin Pie Bars – I Wash You Dry or try a different format with an easy sheet pan pumpkin pie for a slightly different presentation.
Give this recipe a try, share it with friends, and tell me how you topped yours. I love hearing which tweak became a new family favorite.
Sheet Pan Pumpkin Pie Bars
Ingredients
Method
- Preheat oven to 375°F (190°C). Line a 13×18 inch rimmed sheet pan with parchment, leaving a bit overhang.
- In a large bowl, whisk together flour, sugar, and salt.
- Cut in the cold butter until the mixture resembles coarse crumbs.
- Add the beaten egg and mix until the dough holds together. Press the dough into the sheet pan.
- Bake crust for 12 to 15 minutes until lightly golden.
- Whisk together pumpkin puree, brown sugar, eggs, egg yolk, evaporated milk, and spices until smooth.
- Remove crust from oven and reduce temperature to 350°F (175°C). Pour pumpkin filling over warm crust.
- Sprinkle nuts on top if using and bake for 25 to 30 minutes until set.
- Cool the sheet pan on a wire rack for 2 hours then chill for at least 1 hour.
- Lift out using the parchment overhang and cut into 24 squares or rectangles.
Notes

- Vegan Love Letter Pastries: Flaky Strawberry Jam Envelopes - January 16, 2026
- Beefy American Goulash - January 13, 2026
- Authentic Tom Kha Gai Soup Recipe - January 11, 2026