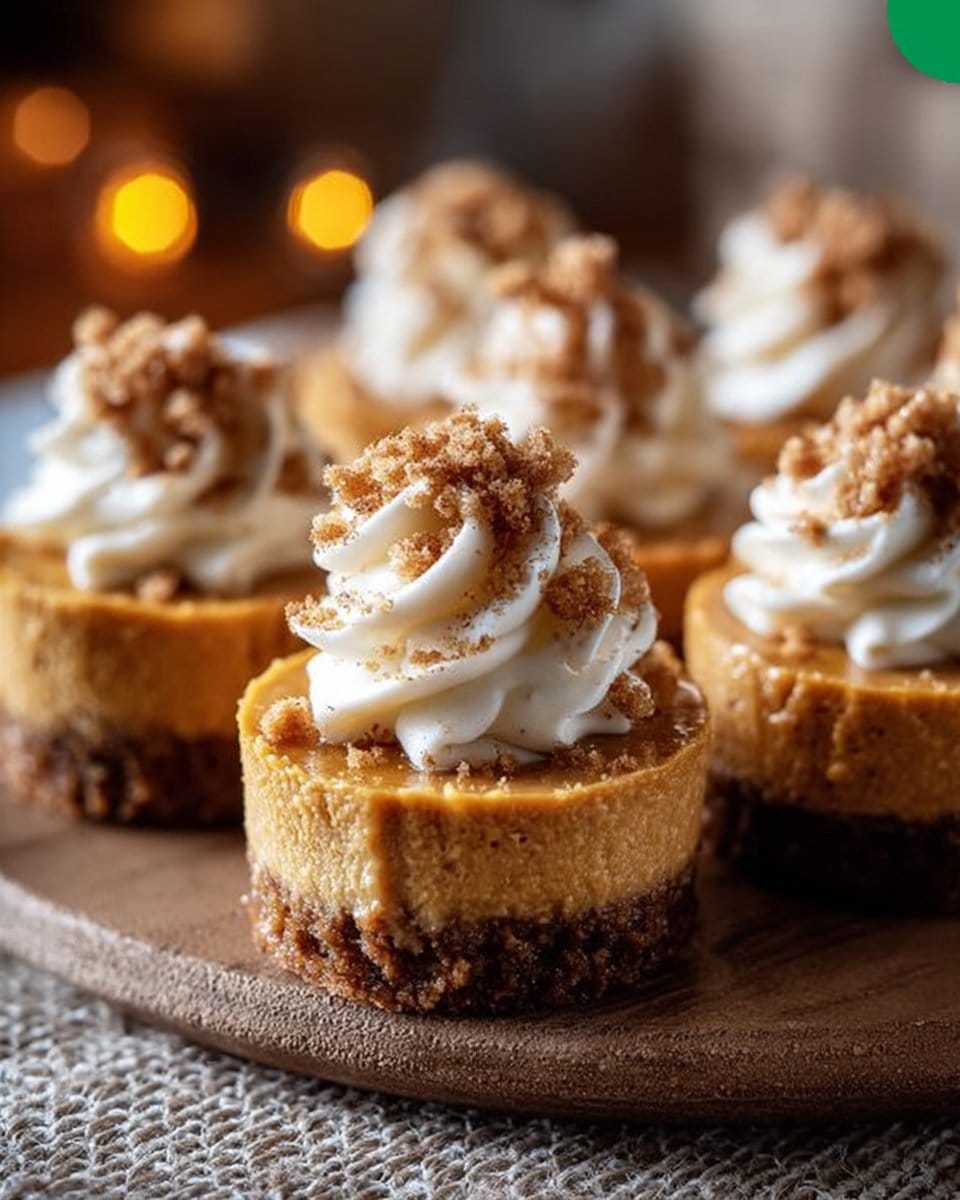
No Bake Pumpkin Mini Cheesecakes
Introduction
There’s something magical about the arrival of autumn that always brings back fond memories of family gatherings around a table filled with the comforting scents of cinnamon, nutmeg, and pumpkin. My journey to discovering the No Bake Pumpkin Mini Cheesecakes started when I wanted a simple dessert that encapsulated the cozy essence of fall without spending hours in the kitchen. The warmth of each creamy bite resonates with me, reminding me of my grandmother’s kitchen, filled with laughter and the tantalizing smells of her favorite fall recipes. These mini cheesecakes are not just a dessert; they are a bridge to those cherished moments, bringing family and friends together around the table to share in the sweetness of the season.
What Makes This Recipe Special
What sets these No Bake Pumpkin Mini Cheesecakes apart is not just their exquisite flavor but also their convenience. They’re a healthier alternative to traditional cheesecakes lighter, fully satisfying, and perfect for gatherings. The beauty of these mini treats lies in their versatility; they’re an ideal make-ahead option that allows you to indulge in the flavors of fall without the fuss of baking. Whipping them up requires mere minutes, making them a must-try for anyone looking to bring a touch of autumn into their home. Your friends and family will adore these delightful desserts, and you’ll love how quickly they come together.
What You’ll Need
For the Crust:
- 1 cup graham cracker crumbs
- 2 tablespoons granulated sugar
- 1/4 cup unsalted butter, melted
For the Filling:
- 8 ounces cream cheese, softened
- 1 cup pumpkin puree (fresh or canned)
- 3/4 cup powdered sugar
- 1 teaspoon vanilla extract
- 1 teaspoon ground cinnamon
- 1/2 teaspoon ground nutmeg
- 1/4 teaspoon ground ginger
- 1/2 cup heavy whipping cream
Note: For the crust, using high-quality graham crackers will give you a more flavorful base. If you want a gluten-free option, substitute the graham cracker crumbs with ground almonds or gluten-free cookie crumbs.
How to Prepare This Recipe
Step 1
In a mixing bowl, combine the graham cracker crumbs, granulated sugar, and melted butter. Stir until the mixture resembles wet sand.
Step 2
Evenly distribute the crumb mixture into mini cheesecake cups or small dessert glasses, pressing down firmly to form a solid crust. Place them in the refrigerator to set while you prepare the filling.
Step 3
In another bowl, beat the softened cream cheese until smooth and creamy.
Step 4
Add the pumpkin puree, powdered sugar, vanilla extract, cinnamon, nutmeg, and ginger to the cream cheese. Mix until fully combined and smooth.
Step 5
In a separate bowl, whip the heavy cream until stiff peaks form. Gradually fold the whipped cream into the pumpkin filling until fully combined, being careful not to deflate the mixture.
Step 6
Spoon the filling into the prepared crusts, smoothing it with a spatula for an even finish.
Step 7
Cover and refrigerate the mini cheesecakes for at least 3 hours or until set.
Step 8
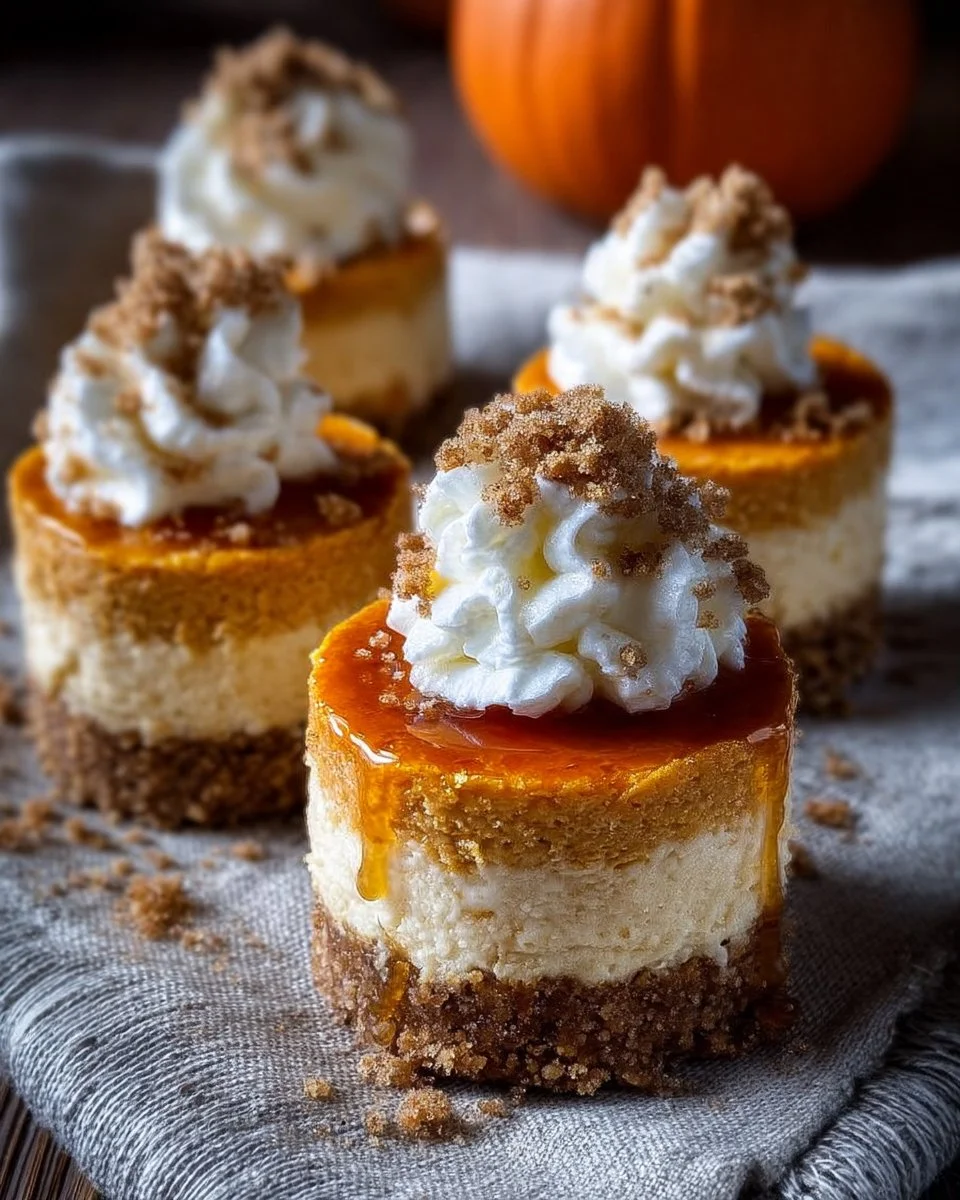
Before serving, you can garnish with whipped cream, a sprinkle of cinnamon, or crumbled graham crackers if desired.
Tips & Recipe Variations
- For a richer flavor, consider adding a teaspoon of maple syrup to the filling.
- If you prefer a different spice profile, experiment with a pinch of allspice or cloves.
- Make it dairy-free by substituting the cream cheese with a vegan cream cheese alternative and using coconut cream in place of heavy whipping cream.
- Store any leftovers in an airtight container in the refrigerator for up to 3 days. If you want to prepare them ahead of time, they can be frozen for up to a month. Just allow them to thaw in the fridge before serving.
How to Enjoy This Dish
These No Bake Pumpkin Mini Cheesecakes shine as a standalone dessert but also pair beautifully with a warm cup of spiced tea or apple cider. For a festive touch, serve them alongside pumpkin spice cookies or fresh fruit like apples and pears to add a refreshing contrast. Presentation is key; consider plating them on a rustic wooden board with fall-themed decor for an inviting atmosphere that evokes the spirit of the season.
Common Questions
Can I make this recipe ahead of time?
Absolutely! These mini cheesecakes are perfect for prep ahead of time, making them ideal for parties or holiday gatherings.
Can I freeze the leftovers?
Yes, you can freeze them! Just ensure they are in an airtight container and thaw in the refrigerator before serving.
What can I use instead of cream cheese?
You can use vegan cream cheese or silken tofu blended until smooth for a dairy-free version.
How do I prevent the filling from becoming watery?
Make sure your pumpkin puree is well-drained, particularly if using fresh pumpkin. This will help prevent excess moisture.
Can I make this vegetarian or dairy-free?
Yes! Simply substitute the cream cheese with a suitable vegan alternative and use coconut cream instead of heavy cream to keep it dairy-free.
Conclusion
The No Bake Pumpkin Mini Cheesecakes are more than just a dessert; they are a delightful way to celebrate the flavors of fall while making lasting memories with loved ones. The blend of creamy pumpkin with the light airy texture of whipped cream creates a dessert that everyone will love. I encourage you to dive into this recipe, share your results, and embrace the season’s spirit of sharing and togetherness. Your family and friends will surely thank you for this delicious treat!
“These No Bake Pumpkin Mini Cheesecakes stole the show at our fall gathering! So easy to make and absolutely delicious I’ll definitely be making them again!” – Sarah J.
No Bake Pumpkin Mini Cheesecakes
Ingredients
Method
- In a mixing bowl, combine the graham cracker crumbs, granulated sugar, and melted butter. Stir until the mixture resembles wet sand.
- Evenly distribute the crumb mixture into mini cheesecake cups or small dessert glasses, pressing down firmly to form a solid crust. Place them in the refrigerator to set while you prepare the filling.
- In another bowl, beat the softened cream cheese until smooth and creamy.
- Add the pumpkin puree, powdered sugar, vanilla extract, cinnamon, nutmeg, and ginger to the cream cheese. Mix until fully combined and smooth.
- In a separate bowl, whip the heavy cream until stiff peaks form. Gradually fold the whipped cream into the pumpkin filling until fully combined, being careful not to deflate the mixture.
- Spoon the filling into the prepared crusts, smoothing it with a spatula for an even finish.
- Cover and refrigerate the mini cheesecakes for at least 3 hours or until set.
- Before serving, you can garnish with whipped cream, a sprinkle of cinnamon, or crumbled graham crackers if desired.
Notes
- Hearty Hobo Casserole - January 13, 2026
- Classic Avgolemono (Greek Egg and Lemon Soup) - January 11, 2026
- Moist Chocolate Peanut Butter Poke Cake - January 4, 2026