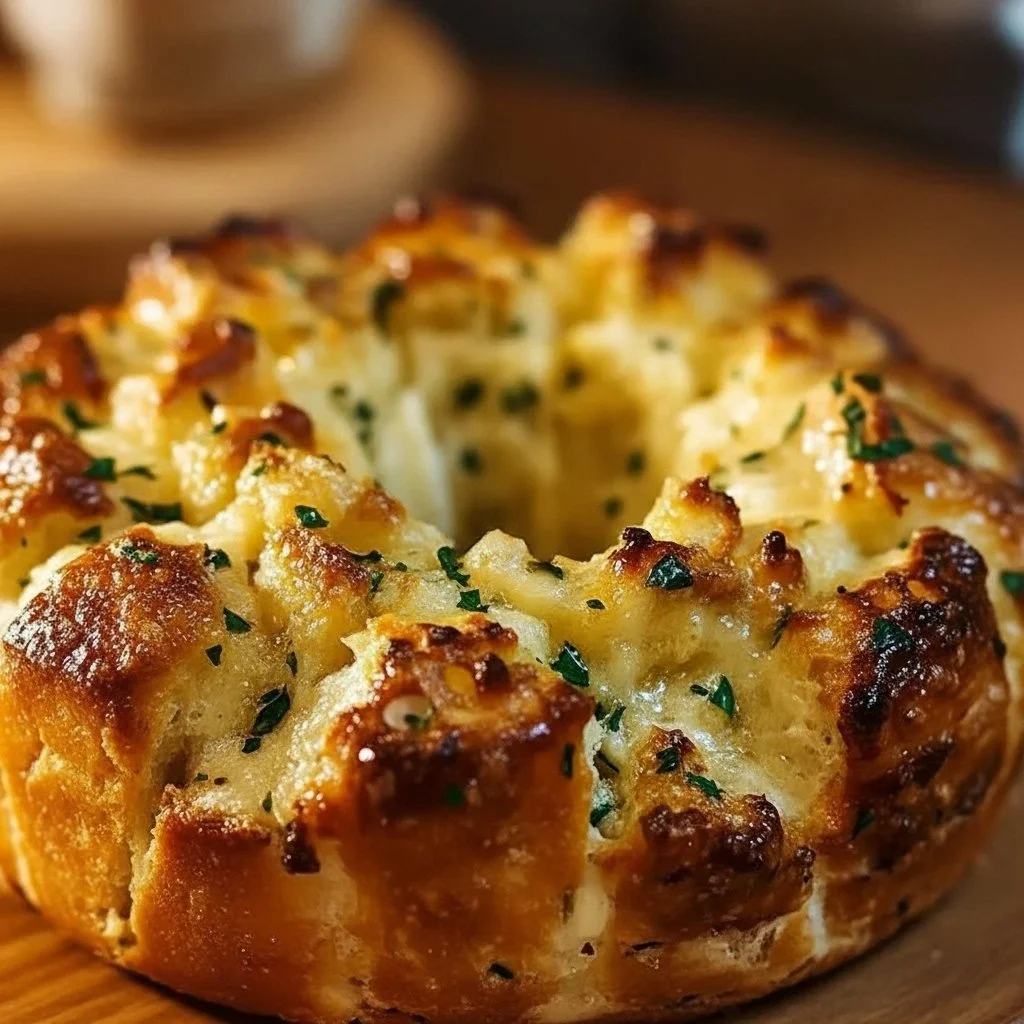
Cheesy Garlic Pull-Apart Bread
Introduction
I first baked this cheesy garlic pull-apart bread on a rainy Saturday when the house smelled like childhood comfort. I was craving something warm, buttery, and a little indulgent to curl up with while reading by the window. The first pull of a cheesy, garlicky wedge and the stringy mozzarella that followed convinced me this would become a staple for cozy nights.
The sensory memory of golden crust, melted cheese, and fragrant garlic is what keeps me making it for friends and family. It is simple, forgiving, and always results in a crowd-pleasing loaf. If you love warm, shareable breads, you might also enjoy this twist on sweet bread classics like this banana bread cake with cream cheese frosting for dessert after your cozy meal.
What Makes This Recipe Special

This pull-apart bread is special because it takes basic ingredients and transforms them into something festive and comforting. Key benefits:
- Quick to assemble and bakes in under 30 minutes once prep is done.
- Family-approved crowd pleaser that works as an appetizer, side, or snack.
- Customizable: swap cheeses or add herbs and proteins to suit your tastes.
- Uses store-bought bread for ease or a homemade boule if you prefer.
Readers will love how easily this recipe upgrades a simple loaf into a shareable centerpiece for cozy nights, game days, or impromptu dinner parties.
Ingredients You’ll Need
For the Bread
- 1 large round crusty loaf (about 16 ounces), such as sourdough or boule day-old loaf works best for structure
For the Garlic-Herb Butter
- 6 tablespoons unsalted butter, softened
- 3 cloves garlic, finely minced (about 1 tablespoon)
- 2 tablespoons fresh parsley, finely chopped
- 1 teaspoon fresh thyme leaves, chopped (optional)
- 1/4 teaspoon fine sea salt
- 1/8 teaspoon black pepper
For the Filling
- 8 ounces shredded mozzarella cheese (about 2 cups), fresh shredded melts best
- 4 ounces shredded sharp cheddar (about 1 cup) for flavor depth
- 1/4 cup grated Parmesan cheese, finely grated
- 2 tablespoons olive oil for brushing crust
- Optional add-ins: 4 ounces cooked bacon pieces, 1/2 cup caramelized onions, or 1/2 cup chopped roasted red peppers
Notes on ingredients
- Use high-quality butter and freshly minced garlic for best flavor.
- Freshly shredded cheese melts better than pre-shredded, which often contains anti-caking agents.
- Bread can be homemade or store-bought; a crusty boule gives the best pull-apart texture.
How to make Irresistible Cheesy Garlic Pull-Apart Bread for Cozy Nights
Step 1: Preheat and prep
- Preheat oven to 350°F (175°C). Line a baking sheet with parchment paper or foil for easy cleanup.
- In a small bowl, combine the softened butter, minced garlic, parsley, thyme if using, salt, and pepper. Mix until smooth.
Step 2: Cut the loaf
- Place the loaf on a cutting board. Using a sharp serrated knife, make diagonal cuts about 1 inch apart across the loaf from top to bottom, without cutting all the way through. Turn the loaf 90 degrees and make another set of diagonal cuts to create a crosshatch pattern. The loaf should remain intact at the bottom. You will have small blocks of bread that are still attached.
Step 3: Fill the cracks
- Use a thin spatula or small spoon to gently open the cuts and spread a little of the garlic-herb butter into each opening. Be generous but avoid forcing the loaf apart.
- Tuck shredded mozzarella and cheddar pieces into the gaps, distributing evenly. Sprinkle grated Parmesan over the top and into some crevices for an extra golden crust. Add any optional add-ins in small amounts so the loaf holds together.
Step 4: Brush and wrap
- Lightly brush the loaf crust with olive oil to promote browning.
- Wrap the loaf loosely in foil and place it on the prepared baking sheet.
Step 5: Bake
- Bake covered for 15 minutes to allow cheeses to melt and butter to seep in.
- Remove foil and bake an additional 8 to 12 minutes, or until the cheese is bubbly and the crust is golden brown. Look for bubbling cheese between the slits and a crisp, golden top as visual cues.
Step 6: Finish and serve
- Remove from oven and let rest for 3 to 5 minutes so the cheese sets slightly. Garnish with a little extra chopped parsley or a light sprinkle of Parmesan.
- Serve warm, pulling apart the cheesy wedges with fingers or a fork.
Tips & Recipe Variations
- Use high heat briefly for extra crust: after removing the foil, broil on low for 1 to 2 minutes while watching closely to achieve a golden top.
- Avoid soggy bread: don’t overstuff with wet fillings and keep add-ins (like tomatoes) limited or roasted to remove excess moisture.
- Vegetarian option: omit bacon and add sautéed mushrooms or spinach with a squeeze of lemon.
- Gluten-free option: use a gluten-free round loaf and follow the same technique.
- Make-ahead: prepare the loaf up to the point of wrapping, refrigerate for up to 24 hours, then bake straight from the fridge adding 3 to 5 extra minutes.
- Freezing leftovers: store cooled pieces in an airtight container for up to 3 months. Reheat in a 350°F oven until warmed through.
- Reheating: bake at 350°F for 8 to 12 minutes, or microwave briefly and then crisp in the oven to restore texture.
How to Serve
- Serve as a centerpiece appetizer with a small bowl of marinara or herbed olive oil for dipping.
- Pair with a crisp green salad, roasted vegetables, or a warm bowl of tomato soup for a comforting meal.
- Drinks: pairs well with a light red wine, crisp lager, or a warming herbal tea.
- Presentation tip: place loaf on a rustic wooden board, garnish with extra parsley, and provide small plates and napkins so guests can pull apart pieces easily.
- Nutrition note: serves about 6 to 8 people. Calorie count varies by cheese and add-ins; expect 350 to 500 calories per generous serving.
Frequently Asked Questions
Q: Can I make this recipe ahead of time? A: Yes. Prepare the loaf and wrap it in foil, refrigerate up to 24 hours, then bake adding a few extra minutes.
Q: Can I freeze the leftovers? A: Absolutely. Cool completely, portion, and freeze in airtight containers for up to 3 months. Reheat in the oven for best texture.
Q: What can I use instead of mozzarella? A: Try provolone, fontina, or a melty Swiss. Combine cheeses for depth of flavor.
Q: How do I prevent the dish from becoming watery? A: Avoid wet fillings like fresh tomatoes without roasting. Use fresh-shredded cheeses and do not overfill the loaf.
Q: Can I make this dairy-free? A: Yes. Use dairy-free butter and vegan melting cheeses. Texture and flavor will differ but the pull-apart experience remains.
“This cheesy garlic pull-apart bread transformed our movie night. Crispy on the outside, incredibly gooey inside, and everyone fought for the last piece. A new family favorite.” – Emma R., home baker
Conclusion
This cheesy garlic pull-apart bread brings people together with simple ingredients and big flavor. It is my go-to for chilly evenings when we want something comforting that encourages sharing and conversation. If you enjoy dipping your bread, you may also like this rich Cheesy Garlic Bread Dip which pairs beautifully with leftover pull-apart pieces. Give it a try, share your results, and tell me which variation became your favorite.

Cheesy Garlic Pull-Apart Bread
Ingredients
Method
- Preheat oven to 350°F (175°C). Line a baking sheet with parchment paper or foil for easy cleanup.
- In a small bowl, combine the softened butter, minced garlic, parsley, thyme if using, salt, and pepper. Mix until smooth.
- Place the loaf on a cutting board. Using a sharp serrated knife, make diagonal cuts about 1 inch apart across the loaf from top to bottom, without cutting all the way through.
- Turn the loaf 90 degrees and make another set of diagonal cuts to create a crosshatch pattern, ensuring the loaf remains intact at the bottom.
- Gently open the cuts and spread some of the garlic-herb butter into each opening.
- Tuck shredded mozzarella and cheddar into the gaps, distributing evenly. Sprinkle grated Parmesan over the top and add any optional add-ins.
- Lightly brush the loaf crust with olive oil.
- Wrap the loaf loosely in foil and place it on the prepared baking sheet.
- Bake covered for 15 minutes.
- Remove foil and bake an additional 8 to 12 minutes, or until the cheese is bubbly and the crust is golden brown.
- Remove from oven and let rest for 3 to 5 minutes. Garnish with chopped parsley or a sprinkle of Parmesan.
- Serve warm, pulling apart the cheesy wedges with fingers or a fork.
Notes

- Vegan Love Letter Pastries: Flaky Strawberry Jam Envelopes - January 16, 2026
- Beefy American Goulash - January 13, 2026
- Authentic Tom Kha Gai Soup Recipe - January 11, 2026